Search for the wordpress-https plug-in via your control panel, or download here. After installing and activating, you may have to edit your wp-config.php file to remove the FORCE_SSL statements you inserted when setting up a custom WordPress SSL site. I commented mine out instead of deleting the lines
/* Force SSL */
//define('FORCE_SSL_ADMIN', true);
//define('FORCE_SSL_LOGIN', true);

/* That's all, stop editing! Happy blogging. */
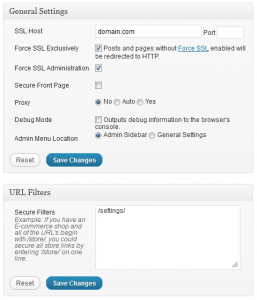
The wordpress-https plug-in will be showing on your main site, and not under the Network Admin site. A menu item will be on the left for HTTPS, select this to continue your setup.
Your site  name should already be filled in, and a port number is not necessary unless you are using a custom port for your SSL connections. By default, port 443 is the standard SSL connection port but it is not put in the field on the form.
Tick the Force SSL Excusively to allow interaction between SSL and non-SSL pages while browsing the site. This will take users out of SSL mode when visiting other pages on your site you decided did not need to be encrypted. This also reduces the workload of the server as SSL pages put a bit more overhead on busy sites, and makes for a cleaner transition for your visitors when switching between pages.
Tick the Force SSL Administration, this performs the same features as the prior settings you commented out in your wp-config.php file earlier. You should always have logons over an SSL connection, and backend administration secured as well.
The remaining four settings are optional, and up to your individual setup.
Under URL Filters is where you set the directory name you want sent over SSL. In the BuddyPress case this would be /settings/.
Save your changes and your members will now be sent over an SSL page when changing their password or email.
If you liked this article, then please follow me on Twitter and Facebook.